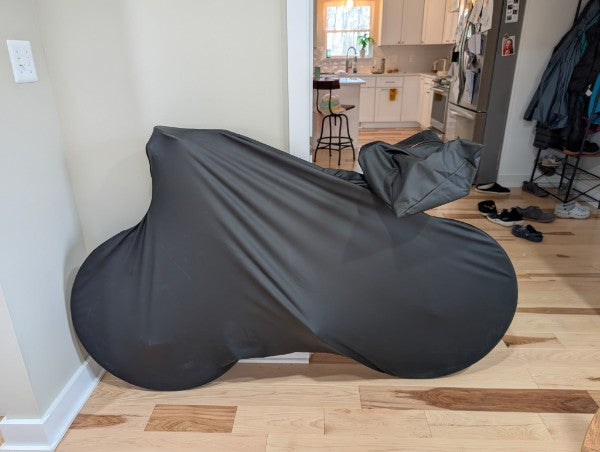
How to Install the Bike Bivy
Share
Finally, your search for a quality inexpensive waterproof bicycle cover has ended and you found the Bike Bivy, hooray! Now, it's time to read this manual before you use it! You must read this manual before using your Bike Bivy to ensure it is used as intended.
The Full Bike Cover is made of a durable four way stretch waterproof material and the zippers are top of the line and made by YKK. All (and we mean ALL!) of the components that go into making the Bike Bivy are made in the USA as is the Bike Bivy itself! Care instructions can be found on the tag inside the Bike Bivy.
Bike Bivy use:
Note, when using your Bike Bivy on a bicycle that will be transported on a bike rack, you must consider the following:
Bike rack compatibility: Only rear car bike racks where bikes are attached in an upright position (vertically) can be used with the Bike Bivy.
Speed Limits: Vehicle bike racks come with speed restrictions and warnings that must not be exceeded. Aerodynamic drag increases with speed, and exceeding the speed rating could effectively exert too much force onto the bike cover. Adjust your speed to the driving conditions of the road to include but not limited to the wind speed, the load being carried, current driving conditions, road type, road quality, traffic intensity, and applicable speed limits. If necessary, use a lower speed and follow all of your Bike rack manufactures guidelines. All Local, State and Federal speed limits and traffic laws must always be followed.
Tail lights and license plate obstruction: An additional number plate and/or rear lights might be required for your bike rack and should be attached per the manufacturers guidance in accordance with all Local, State and Federal laws.
Spacing: Keep enough distance between bicycles covered with Bike Bivys so there are no contact points.
DO NOT WEAR: The Bike Bivy is not wearable apparel. Misuse as a garment may cause injury or suffocation. Use only to cover bicycles.
Suffocation Hazard: This product is not a toy. To avoid danger of suffocation, keep the Bike Bivy away from babies, small children, and individuals under adult care.
Sharp Protruding Objects: Check for any sharp items on the bike rack or your bicycle. Use the pedal covers provided to help decrease premature fabric wear in areas where the Bike Bivy will touch the pedals.
Bike Inspection: Inspect your bike after Bike Bivy use to ensure your bicycle functions as it was intended per the bicycle manufacturer.
Transport Safety & Product Care
Overhead Hazards & Vehicle Handling: Watch out for low tree branches, bridges, and parking structures that could strike your Bike Bivy. Extra gear alters how your vehicle steers. Tighten all levers, locks, and mounts before driving.
Correct Application: Use your Bike Bivy only for its intended purpose. Do not exceed maximum load limits.
Physical Damage: Shield your Bike Bivy from forceful impacts, jagged edges, and sharp objects.
Remove Bike Bivy after use: The Bike Bivy can trap moisture if placed over a wet or dirty bicycle. If you use the cover under these conditions, remove it promptly once you reach your destination to clean or maintain your bicycle. This prevents trapped moisture from rusting or degrading your bike's components. If your bicycle is completely dry, the cover can safely remain on.
Failure to follow these instructions may result in personal injury, property damage, or product degradation. Improper use voids the warranty. For questions or product support, please visit BikeBivy.com or contact BikeBivy@gmail.com.
How to use/functionality
- Prep: Unzip the handlebar cover to remove the main Bivy, pedal covers, and cinch straps.
- Pedals: Position the crank arms horizontally and slide the covers over the pedals.
- Main Body: Drape the Bivy over the bicycle. Ensure the "Made in the USA" tag is on the outside to just behind the rear of the seat, with the zipper nearest it hanging over the rear.
- Front Zip: Start the front zipper at the head tube and zip down to the bottom of the front tire.
- Rear Zip: Zip the rear all the way down and under the tire toward the crank. (Gently lift the bike to clear the tire).
- Finish Base: Lift the front tire and continue the front zipper under the wheel until it meets the rear zipper near the crank. Adjust the final zipper positions as needed.
- Handlebars: Straddle the front wheel facing the rear. Place the unzipped cover on the bars: the "Bike" tag goes on the top right, and the "Bivy" tag on the left.
- Secure: Zip the handlebar cover and tuck the excess material behind the stem (over the main Bivy).
- Cinch: Attach cinch straps to the left and right of the stem around the tops of the handlebars. Tighten firmly to prevent the cover from shifting—especially on flat or TT bars where wind turbulence is higher.
- Final Check: Ensure all zippers are closed and there is no loose material before transport or storage.
Use the Bike Bivy as intended.